My Simple Garage Band Tutorial
Open Garage Band. In the most recent release it looks like this. At the top it states 'New Project' and you need to click on the 'Empty Project' icon and then 'Choose'.
Once you do this a new window opens up and you are presented with a choice of software instrument, and a few others. Click the software instrument and select 'Create'.


Next you need to get rid of the coloured musical typing window that pops up. Now you will see that you have a piano as your instrument. You need to change this by scrolling through the list of instruments in the box to the bottom left. Marimba is under 'Mallets', although if you search for marimba and it is not there you may need to download a set of alternative instruments free from Apple.

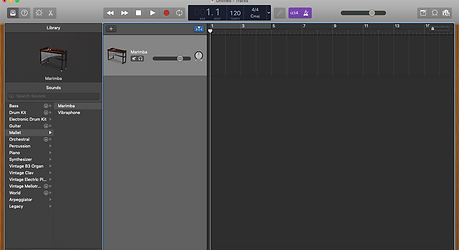
Next, click the third icon in from the left up in the top left corner where there are four icons. You need the one next to the scissors. Clicking this removes the bottom window of Track Control knobs that we are not going to use anyway.
If your window now looks uncluttered and has a marimba in it, you are ready to start.
With the command key pressed down, click the cursor in the area to the right of the marimba controls. A green rectangle will appear. You can click the bottom right corner to extend this over a longer time period or click the top right corner to repeat the same block over and over by pulling the cursor to the right, so making a line of rectangles (which each equate to a bar in the music).
Now, click the scissor icon I mentioned earlier. This will open up a new window across the bottom of the screen. Look for the controls that govern how this is displayed. You need to click score rather than piano roll, you need to click on the key signature to opt for treble clef, and you need to click on notes rather than region.
Now, with the command key held down, click on the stave (ie. the music lines) and a note should appear where the cursor is. This is the start of the song and a dot will appear up on the green rectangle to signify that the marimba has been assigned this note to play.
After this, you just need to play around and have fun. It's fairly intuitive from here on in. My screen for editing the song Pata Pata looks like this....
If you press the space bar your marimba tune will begin to play. Some other things to notice on here include the orange bar above the green tracks. This is a looping function so the four bars repeat over and over.
Also you can adjust the tempo, the time signature and the key all by clicking on the icons in the black window.
The only other thing to think about is the notes. I generally use quavers since marimba notes don't last very long in real life anyway. You can see the note value I am using in the selection window to the left of the score.